
Your Ultimate Guide to Video Production
Managing video production for your brand or as an agency? Check out our ultimate video production guide to use in 2023.
From product launch, customer review, to brand promotion, companies worldwide are producing videos for almost everything.
The process of creating and producing a video can be quite laborious and tedious and often frustrating. However, it is safe to say that it is worth it. Videos have become one of the most widely used means of marketing and promotion today.
Before we go any further, let’s answer a simple question – What is video production?
Put in simple words; video production encompasses the entire process of creating a video. Videos are highly effective in conveying a message to the audience and are often preferred over written text due to their interactive and engaging interface. Investing your time and resources in the effective production of a video will provide you with long-lasting returns.
One of the strongest memories is visual ones. Hence, videos have a long-lasting impression on the viewers.
Creative and engaging videos have the power to form the cornerstone of your marketing strategy. If produced effectively, the right content will target the right people and provide you with the desired results from potential clients.
Let’s give you a detailed step-by-step insight into the various aspects and stages of video production. We will show you how to formulate your video objectives, research and understand your target audience, write a script, set a schedule, manage your resources, plan other specifics, and write a production brief, among other things.
Producing a video is a lot like creating any other form of content. The entire long and complex process can be simplified by breaking it down into manageable segments.
Here, we segment the process of video production into four broad stages. Each stage involves several steps, which have been explained here.
Pre-Production
This is the first stage of the video production process. At this stage, you create or map out a plan or strategy for the video. The most important task is creating a strategy for your video production. This stage is perhaps the longest and forms the foundation of your entire process.
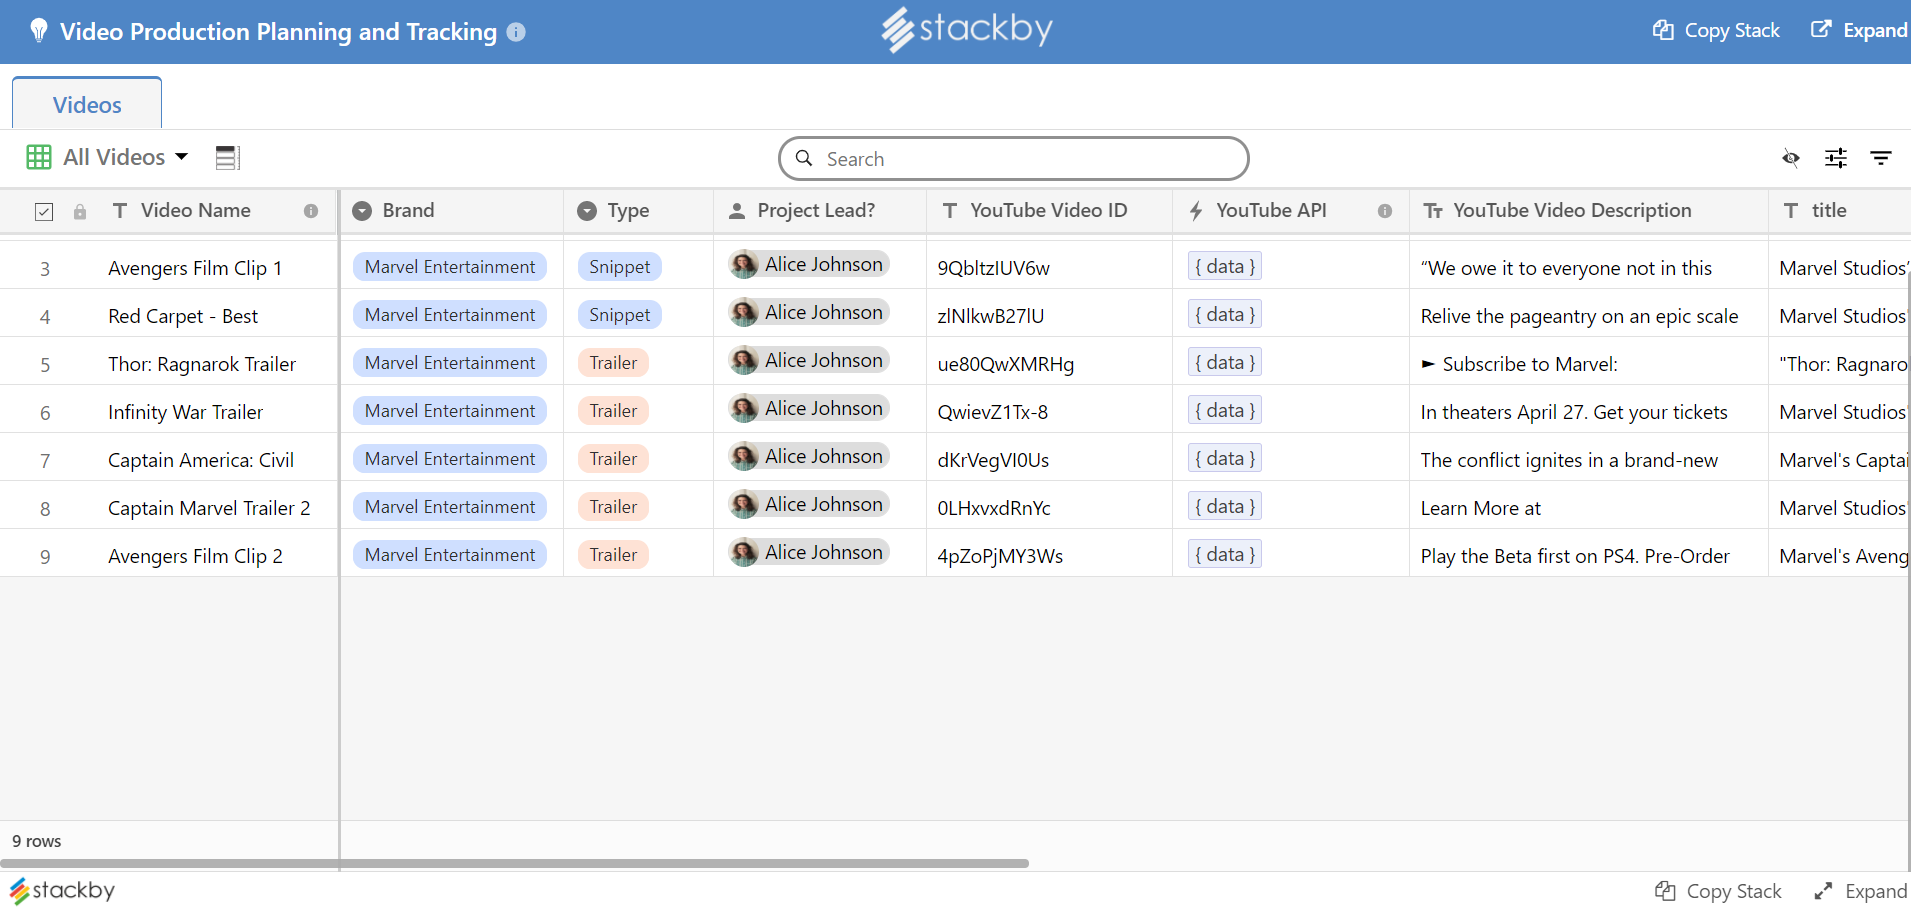
As a result, you have to be very careful while planning here. Here, you will strategize the content of your production, the target of your video, the resources that will be required during the process, the duration of the production process, the script of the shoot, and so on. This phase covers several important steps. You can also make use of the Video Production planning and tracking template by Stackby.
Set your objective
Before you go any further into the planning process, it is highly essential to define your video's objective or ultimate goal. You won't be able to reach your goal if you haven't defined it beforehand.
In other words, in this step, you answer the most primary question – Why are you making the video? You may be creating a video for launching a new product or creating one for customer reviews. Regardless, you should define the objective in clear and simple terms to benefit the entire team.
If you are facing any difficulty setting the objectives, you can follow the SMART methodology to simplify the process. Under this approach, you have to make sure that your video objectives have the following characteristics.
- Specific
- Measurable
- Achievable
- Relevant
- Time-bound
You can also set the objectives by carefully analyzing the problems or issues in your business that could be solved with video. You can also define the measures of success at this stage. This will allow you to analyze and track if the video is achieving its objectives.
Decide your Target Audience
How can you make a video if you don’t know who the video is for? This step answers the question for the target audience.
To create an interactive, engaging, and relevant video, you need to research your target audience carefully. Here, finding the age, gender, or location of your audience is not enough. You need to conduct an in-depth analysis of their problems and concerns, understand their interests and scope of influences.
You can conduct interviews, surveys, get feedback, read customer reviews, or listen to the questions your target audience asks online.
What is your Core Message?
Once you’ve set the objectives and researched your target audience, it is time to finalize the core message of the video. To come up with the core message, you can answer the following three simple questions.
- What action do you want your audience to take after they watch the video you just produced?
- What do you want them to think?
- How do you want them to feel?
This will help you arrive at your core message. You may want your audience to click a link, sign-up for a free trial, subscribe to the company’s YouTube channel or purchase your product. Once you know what you want your audience to do, come up with that one thing your audience must know of to encourage them to act accordingly. This will form the core message of your video.
Build a Video Strategy
Creating a good and effective video strategy at this stage will help you throughout your production process. Here, you need to map out the details of the logistics of your video production process.
This involves deciding how you will spend within your allocated budget and produce the video on time, whether you will create the video content in the house or externally, the method of distribution to ensure that your video reached the target audience, your plan for reusing and repurposing the video for improved ROI, etc.
Answer all the above questions, and you will get your video strategy. However, keep in mind that the video strategy will evolve.
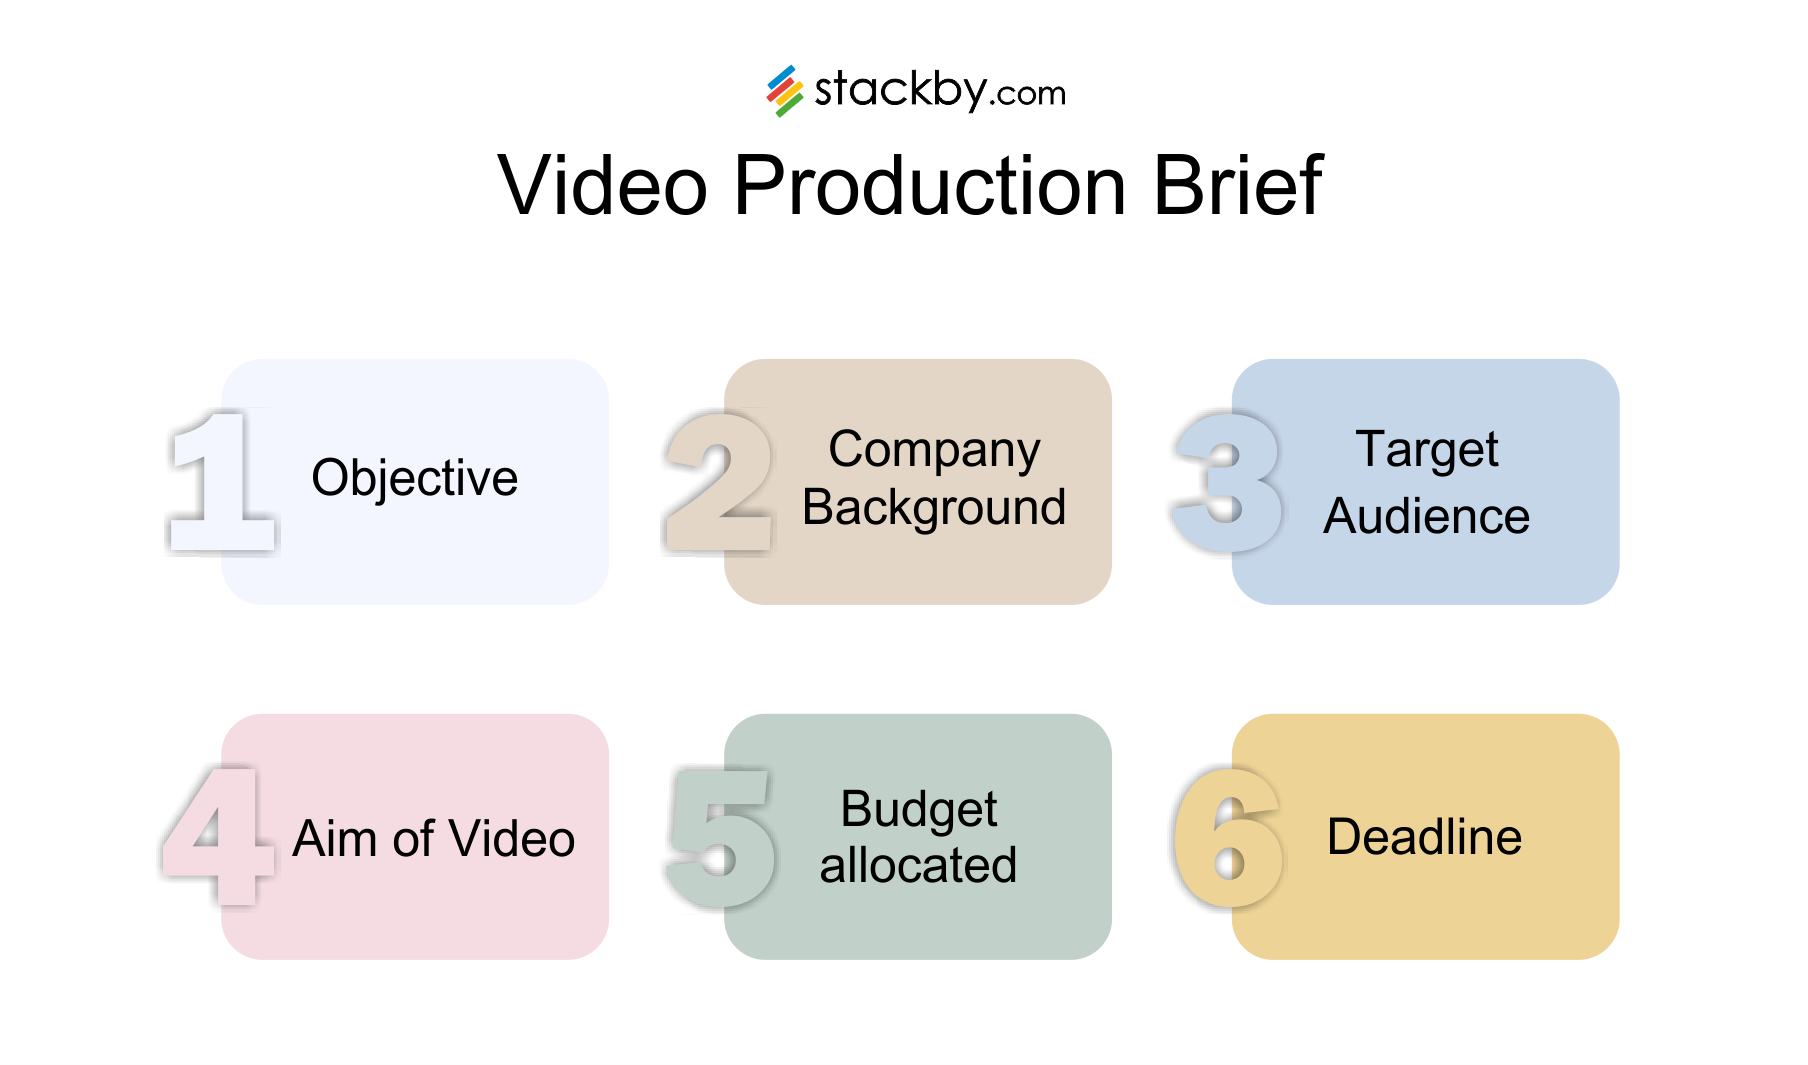
Write a Video Production Brief
A video production brief can be defined as a summary of all the information that you’ve gathered and compiled so far. This brief will include the video objectives, details about your target audience, the core message of your video, your allocated budget and deadline, and so on.
All the relevant details will be included in the production brief, which will help you throughout the video production process. You have to make sure that the brief includes all the information collected without being too long.
What is your Creative Approach?
The creative approach is mostly the idea or concept of your video content. Depending on the brief that you just prepared, you can decide what the video should or should not contain, how the content should be presented, and so on.
Come up with an interesting, engaging, and impressive way of presenting your core message to help achieve your objectives.
You can also take inspiration from other videos with a similar message and try out different approaches. You can also invest some time in studying your competitors and understanding what they're doing and why.
Your ultimate creative approach must be backed by the brief you made in the earlier step.
Write your Script
This is one of the most important steps in the pre-production process. You have already formulated your production brief and decided on your creative approach. It is now time to write the script.
Your creative approach will form the basis of your script. The script you write is the blueprint for your video. It should convey the core message of your video.
The script needs to be engaging, interesting, relevant, and, most importantly, passionate. It should be easy to understand and convey all the required information. It can also include details about specific locations, actors, props, and actions.
If you have already hired the actors and presenters, you can try to write in their style and tone of voice and even include them in the writing process if possible.
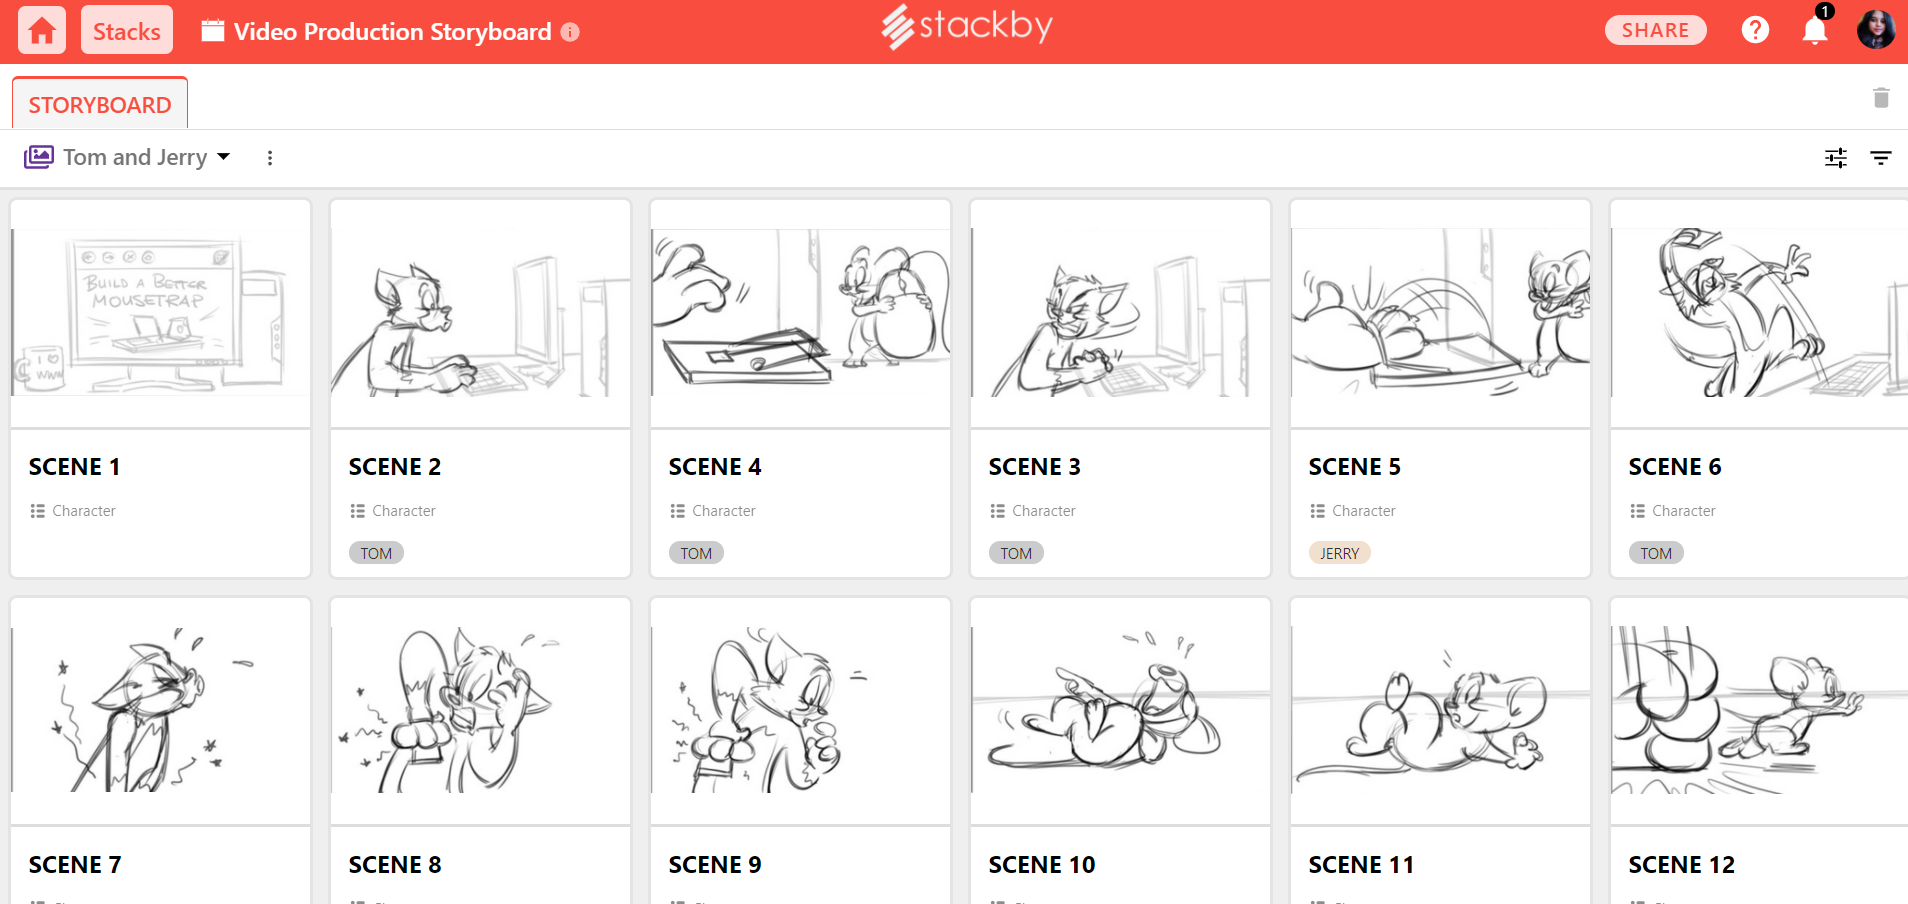
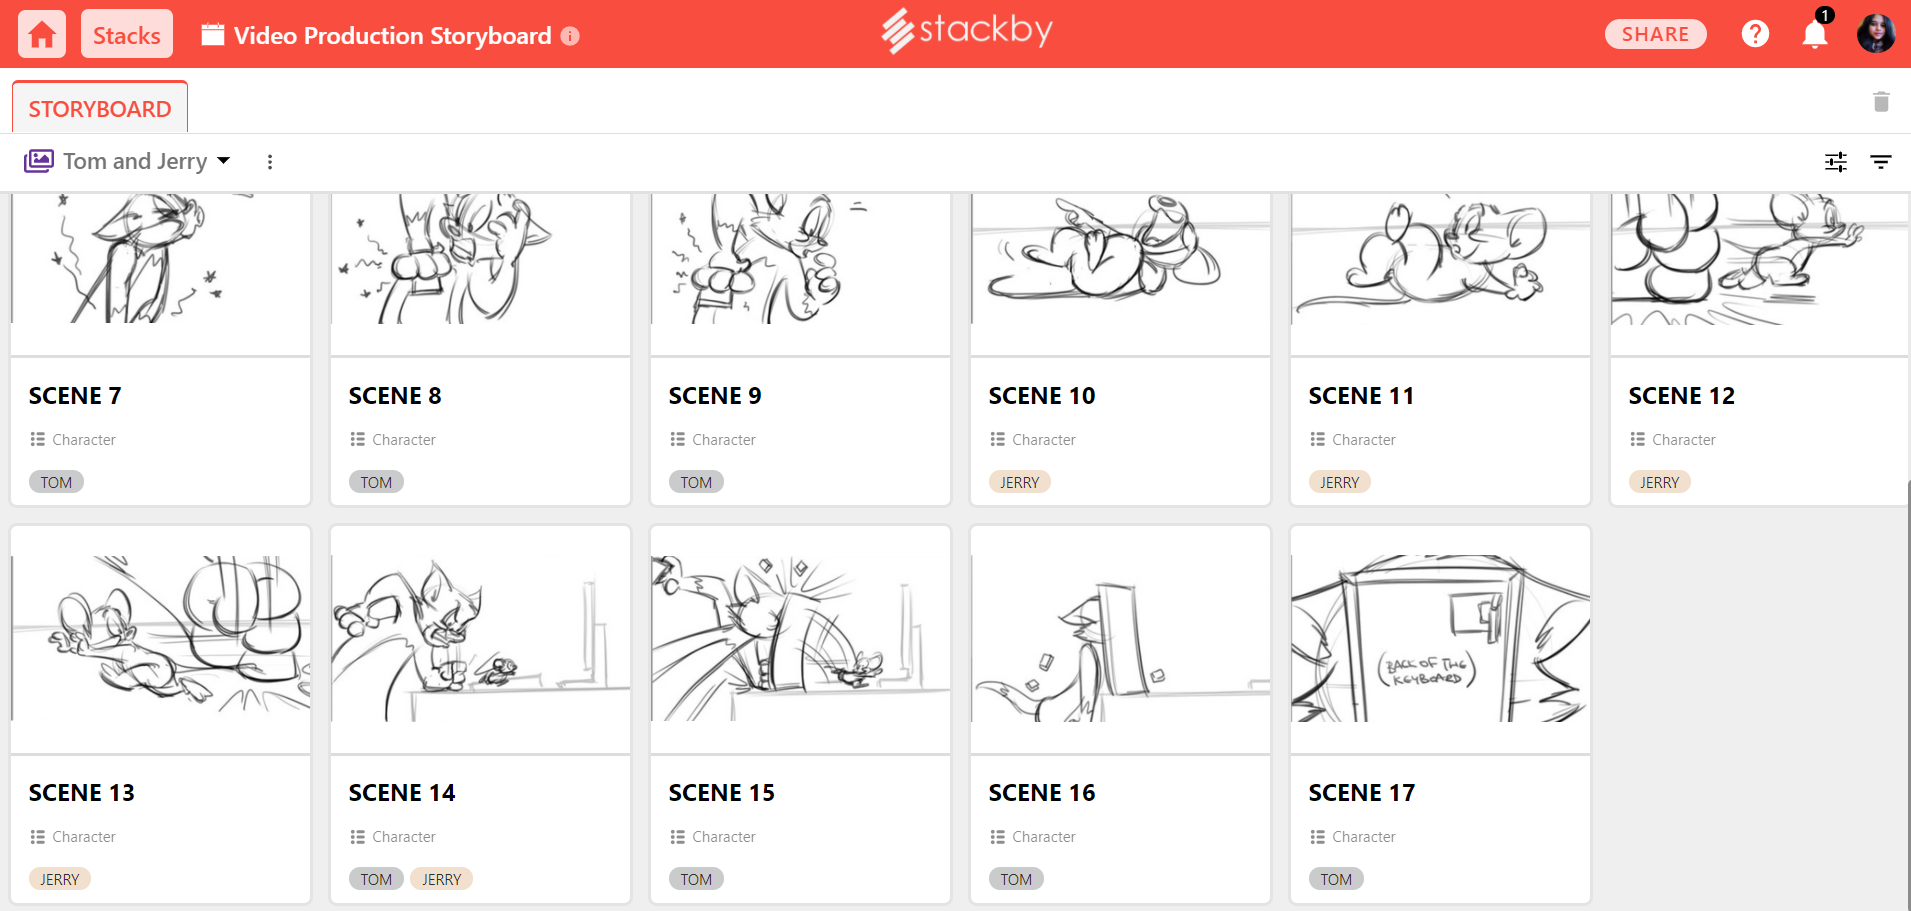
Create your Storyboard
The purpose of a storyboard is to help you visualize and get an idea of how the video will be produced or shot. A scamp is a roughly sketched storyboard that will indicate what kinds of shots you need and where.
Although not always necessary, creating a storyboard will give you a clear visualization of the lighting, coloring, framing, transitions, and many other aspects of the video. You can take screenshots and ideas from similar videos and images to get a better understanding.
The objective here is to have a plan for the scenes so that there is no delay on the day of the shoot. You can also easily create a storyboard with Stackby and share it with your team members. It also becomes easier to keep track of all the changes made.
Scout locations for the shoot
Here, you need to finalize where you are going to shoot your video. Scout a couple of locations to decide on the best one.
If it is a simple video where the talent needs to be highlighted and presented, you can shoot in any quiet room or office space.
However, if you want to shoot the video on multiple locations outside, make sure that you get the requisite permissions to avoid any problems later.
On the other hand, if it is an animated video, you won’t need any location at all. Feel free to use an animated video maker to save your time and resources.
Create an itinerary of the video equipment you need
Ensuring that you have the right equipment available for shooting the video can help you avoid any unnecessary delays at the last moment.
Your list of required equipment depends on the kind of video you are shooting. To start with, you will need a camera and microphone. You will also need the requisite lighting for the shoot. In many cases, you might also need extra lighting, a heater, or a backup generator.
Case talent
If you have gone through and executed each of the steps until now properly, you already have a clear idea of the type of video you are making. You may need to cast talent for multiple roles or none at all. It all depends on the video you’re making.
If your video needs to be acted on the screen, you will have to cast the roles. There is a chance that you already know people suitable for the part. If not, you will have to scout for professionals. You can put up advertisements and host auditions.
Many videos require a voiceover too. You have to look for the kind of personality and tone the audience you’re targeting will respond to.
Schedule your shoot
You have arrived at the end of the pre-production process. You already have all the information, details, and talent needed. All you need to do now is schedule the shoot.
Before you set the schedule, ensure that the locations, crew, cast, equipment, makeup, lighting, costumes, and permissions have been booked earlier. You can also hire a professional, experienced producer to help you manage the shoot if needed. You need to keep in mind a few things while preparing the schedule, including the distance between locations, length of the shoot, and talent's availability.
Do not rush the process as it might create problems in the future.
Production
Now, we move on to the second phase of the process, that is, production. The pre-production stage allowed you to gather all the required information and process the same. You already have a schedule for your shoot.
The production phase spans the actual filming of your video. As far as possible, ensure that the actual shoot takes place according to the schedule that has been set.
A key point to note here is the requirement of a director. A director’s presence is necessary to get the best result possible. He or she will ensure that the cast gives the requisite level of performance, that you get all the shots that you need, that they’re framed and structured in the right manner, and the given script is followed through. You can fill the role or hire experienced professionals for the job.
Set up the lights
The right lighting at the right moment can improve the video drastically. Hence, you must ensure that each set has the required light setting.
Setting the lighting for each shooting scene requires a certain amount of time, especially if you are shooting multiple locations. You should also consider the time required for the same while making the schedule.
Set up the camera
The setup of a camera is completely dependent on the kind of shoot you are planning. Your work may be done using a simple tripod, or you may need to set up an entire crane.
You can easily determine the setup you need by referring to your storyboard and the shot list created in the earlier steps. There are some videos that you can shoot yourself using a simple camera. On the other hand, you may need to hire a professional for the setup for certain other videos.
Similar to the light setup, you have to ensure that you factor in the time required for the camera setup in the schedule.
Direct the footage
This is where the actual shooting takes place. After all the planning and preparation, you have to direct the talent and get the required footage.
The manner and tone of delivery by the talent will have a huge impact on the message of the video. It will influence the video's speed, dynamics, style, and audience appeal. Here, the role of the director is paramount in ensuring that the video is shot properly.
Keep the goal, objective, and core message of your video in mind while shooting the same to get the required performance.
Get the footage
While shooting the video by following your storyboard is important, you should also get extra footage that may prove useful later.
You may use the footage or cut it out while editing. It can include the same shot from different angles or light settings, small clips of the cast and crew getting ready for the shoot, and other behind-the-scenes shots.
To make the process simpler, you can use Stackby’s Video Production Management Template.
Post-Production
Post-Production involves the work that is done on the video after filming or recording has taken place. This phase involves organizing, cutting, coloring, and editing the footage captured in production.
Here, the footage that has been shot is reviewed to select the best shots. You can edit the footage and add visual effects, music, and sound to make it more appealing. You can cut down the unnecessary parts to ensure that the video is of the required length.
Edit the video
You have already collected several shots and takes. In this step, you have to review and compile your best takes. You can use video editing software for the process.
A shot may have some unnecessary parts to it too. You can cut it down to include only the required part. Once you’ve reduced each clip to its most essential part, you can add them to the video editing timeline and rearrange it according to your script and storyboard.
Here, you can also add some of the extra footage that you collected in the production stage. You can use Adobe Premiere Pro, Final Cut, Avid, Filmora Pro or Premiere Elements for editing the video.
Record a voiceover
There are many videos, especially animated ones, that require a voiceover. This is the step where you record the voiceover required. As mentioned in the earlier stage, you can do it yourself or hire a professional with a voice that will appeal to the audience for whom the video is being produced.
The manner of delivering the message and the tone of the same will also have a huge impact. You have to make sure that it is in line with the core message of the video. To record the voiceover, you can use Adobe Audition or TechSmith Audiate.
You can record and edit the audio and add it to the video timeline at the required portion.
Add graphics, animated text, and special effects.
Videos tend to leave a long-lasting impression on the viewers. They can be made very attractive, creative, and appealing with graphics, special effects, and animation.
The effects and graphics can add life to the video and help in emphasizing the important points. They should be added carefully to not deviate from the core message. You can add an animated version of your product or a screen-recording of your website with interactive dialogue.
Colouring
You can hire a professional colorist who will go through each footage and edit the color accordingly. Many advanced video editing softwares come equipped with the option for auto-coloring. You can choose either option depending on your budget.
Coloring plays an important role in helping you reinforce your visual brand in your videos. You must try to keep your coloring consistent with any future videos you make too.
Add music
This is the final step of the post-production process. The right music at the right moment can complement your video's tone and help you emphasize the core message. It can help keep the viewers engaged and fill up any space or audio glitches.
However, do not overload the video with distracting music. You can use different tracks to evoke the mood of different parts of the video. This can help contribute to the completion rates of videos.
You can also add sound effects and other noises to create a more realistic and engaging sound mix.
Optimization and Distribution
We have finally arrived at the fourth and final stage of the video production process. If you have followed each step of the three stages carefully, your work on the video is almost done. All you have to do in this stage is render and distribute the video.
In addition to this, you also have to set up the analytics to track the performance of your video. This will help you get an idea if your current strategy is working according to your expectations.
Render the video
Once you've added all the required graphics, animations, sound effects, voiceover, and music, it is time to render the video in the appropriate format finally. This will depend on the platform that will host the video.
If you are uploading the video on YouTube, Facebook, LinkedIn, and Twitter, it has to be in the mp4 format. You have to edit and crop the video into the square format if you upload it on Instagram as a post. Finally, for Snapchat or an Instagram Story, it will need to be in a vertical video aspect ratio.
On the other hand, you can use the HD version if you’re playing the video at a conference.
Transcribe the video
Transcripts of videos are easily indexable by search engines. Also, adding a transcript makes a video more shareable. People also prefer going through the content of the video summary before deciding whether or not to watch the video. Videos with subtitles are preferred by some users.
You can use tools like HappyScribe for the purpose. HappyScribe uses speech-to-text technology to generate accurate transcripts and subtitles in the minimum possible time. It is also an easy way to repurpose content.
Setup Analytics
To gauge the performance of your video, you have to set up the right video metrics. In this step, you have to analyze if the video meets the required objectives with which it was made.
If you have hosted your video on a paid hosting platform like Wistia, the measures to track the performance are already in place. However, if you have uploaded the video on Facebook or YouTube, you have to track them separately. You can subscribe to Google Analytics for the same.
This step is crucial as it will help you understand where you are going wrong and give you an idea about the required improvements you need to make in the future.
To make the process simpler, you can use Stackby’s Video Production Planning and Tracking Template. Stackby also offers the API Integration facility. You can integrate your template with YouTube using the unique API key. This will allow you to draw in the metrics data directly into your template. You will be able to view real-time updates of the number of views, likes, dislikes, comments, etc. of the YouTube video.
Manage YouTube SEO
Optimizing your video for the search engine is one of the key steps to increase your video views. Make sure that you optimize your video title to include the focus keyword. In addition, you also have to use the right tags for the video. Tagging allows you to add more keywords that will help you get more views.
To rank high in the list, you can also encourage people to comment on the video and subscribe to your channel. This is because popular content is always prioritized. Although not as relevant as the other factors, the video thumbnail also plays an important role.
Distribute and Promote your Video
This is the last step of the entire process. Now that you have completed your video production work, it is time to distribute and promote the video to reach the largest share of the audience.
You can distribute it on social media, television, partner with an influencer for rapid promotion, embed it with an article, share it with industry outlets, put it along with paid advertisements, share it via an email newsletter, upload it on YouTube, etc.
There is no shortage of the number of platforms on which you can promote your video. However, you have to keep your earlier strategy and target audience in mind while choosing the platform.
You will also need to market your video where your audience will see it and in a way that makes your core message clear. You can use SEO to optimize your video for relevant keywords.
The goal here is to get the maximum ROI with minimum cost.
Conclusion
This was a detailed overview of the entire video production process. Follow each step carefully, and rest assured that you will end up with a great video that will attract many potential customers and users. You can also use Stackby’s Digital Video Production Template to help you through the entire process.
