
Step by Step Guide on How to Build Forms in a Database [2026]
Stackby makes it easier for businesses to create forms in a database. Learn how to create advanced database forms in a snap, collect responses, and manage all form data in one place.

What are forms in a database?
A form is a database object that contains different fields. These fields collect information from a source which is collected and stored in a database for further reference.
Businesses these days can make use of database forms to gather information via web browsers. Modern database form builders allow the users to customize the forms by adding colors, their brand logo, backgrounds, a variety of fields such as bar codes, take payments, and much more! We can also include conditional statements in these database forms and handle dynamic behavior.
According to Hubspot, 74% of marketers are using web forms for lead generation, and 49.7% of marketers say that web forms are their highest converting lead generation tool.
All the gathered information from a database form can be used to further communicate with the visitors that have interacted or showed interest in a business. Some forms help in understanding the customers better, making it easier for sales and marketing teams to run personalized campaigns for every customer.
Forms are needed everywhere!
Different types of database forms that are used by businesses these days include:
- Contact forms: These forms can be used on the ‘contact us’ page of your website. This form can take the information of any visitor who wants to reach you or know more about your business.
- Lead generation forms: You may use a lead generation form to ask your website visitors to subscribe to your newsletter or download a free resource from your website. This way, you can get the email address of your prospective customers and carry the conversation further with them. Use email verification tools to ensure that your emails don't land in your recipient’s spam.
- Survey forms: These forms are generally longer and require detailed information from your customers.
- Order forms: These forms are used to collect orders & sales information. You can also integrate payment platforms with these forms or add online payment links.
- Booking forms: Hospitality industries often use these forms. But nowadays, booking forms are being used by many different service providers such as for booking doctor appointments, client intakes, etc.
- Applicant tracker forms: These forms are used by Human Resource teams to collect information for applicants applying for several job positions.
- User feedback forms: These forms are used in improving the products and services of a business. They are the most economical methods of understanding customers and measuring customer satisfaction.
How to build forms in a database in 2025
Here’s a step-by-step process that will make it easier for you to build forms in a database with Stackby.
#1. Start with designing a database
The first step to creating a database form is to build a database that will store all the information collected by the form.
At Stackby, you can create a spreadsheet-like database to store data in an organized form. We provide 25+ column types to choose from such as date/time, text, attachments, single options, multiple options, checkbox, ratings, number, email, phone number, and so on.
To create a database in Stackby, you need to create a new stack. This will automatically open a spreadsheet-like database for you.
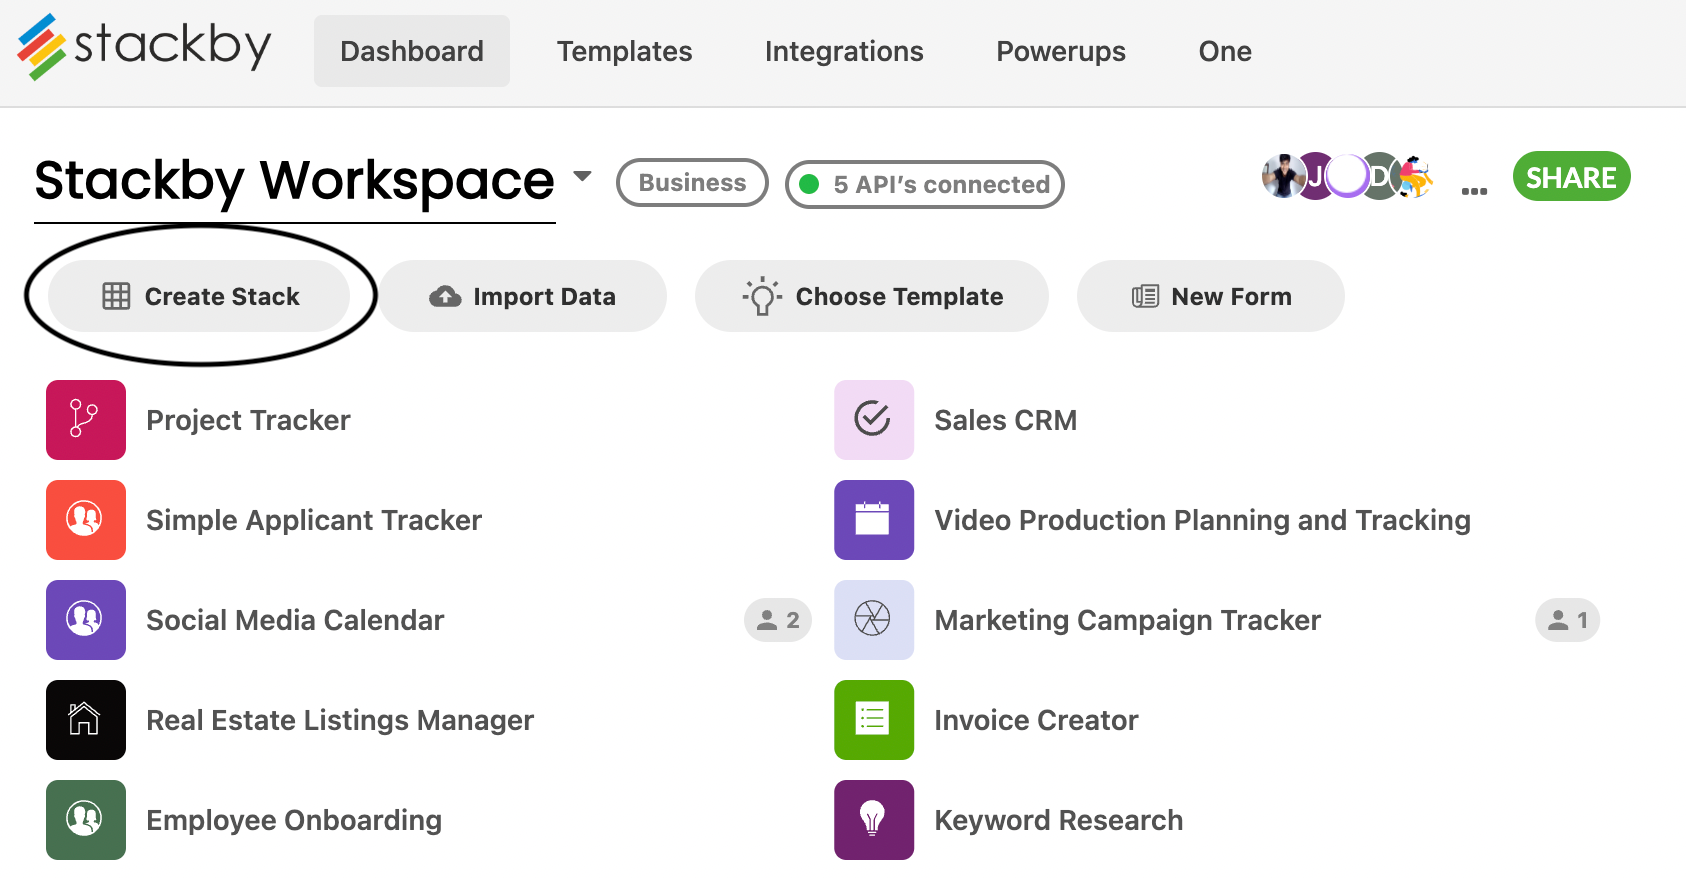
For designing a database for your form, you need to decide the questions or fields that you want to include in the form. Those questions will be added as column names to your spreadsheet-like database.
For example, if you want to build an applicant tracker form, you can choose the form fields as:
- Name
- Applying for (Position)
- Resume
- Phone Number
- and so on.

 Rachit Khator
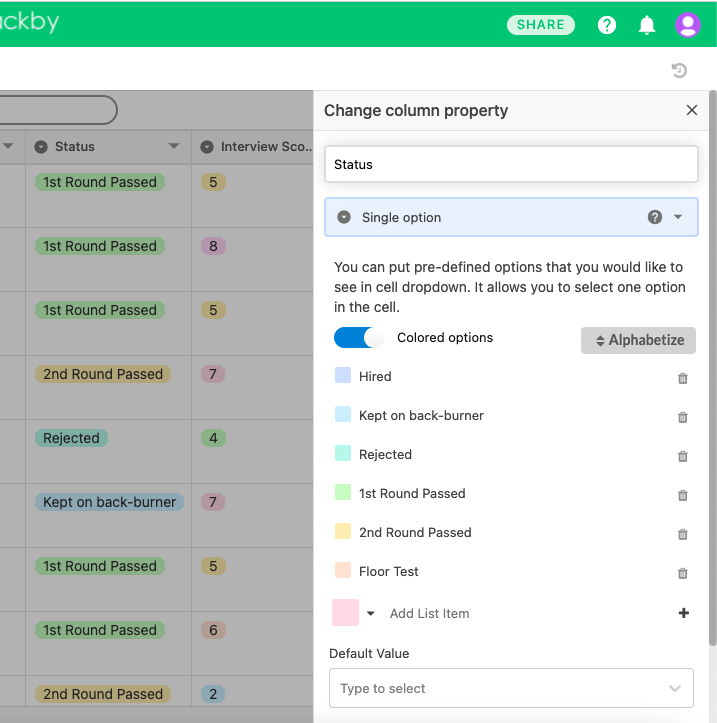
#2. Add your custom fields (columns) to your database
Once you have decided the fields that you want to include in your form, add those fields column names in the Stackby table and start building your database. The main idea behind it is that you need to build a table first and then convert it to a form.
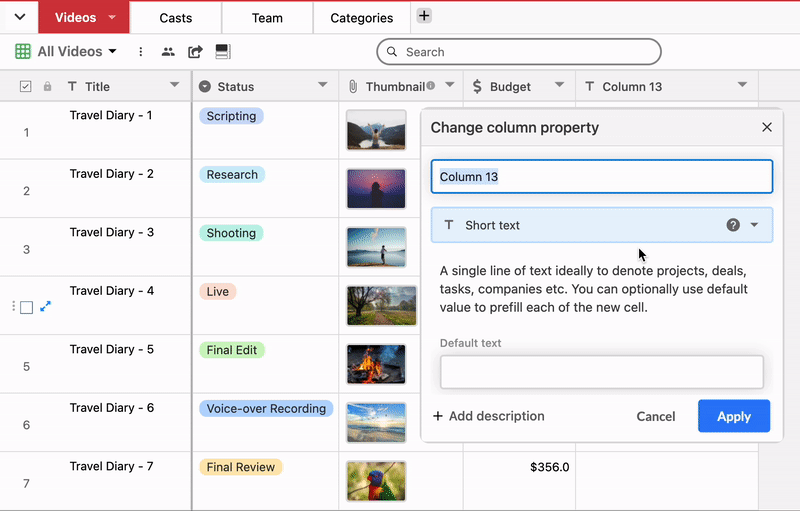
One thing that you have to ensure at this stage is that the property of the column name that you choose is correct. For instance, for the phone number column, choose the column property as the phone number. For adding a custom option type column, choose the column property as a single option and so on.
 Stackby Content Team
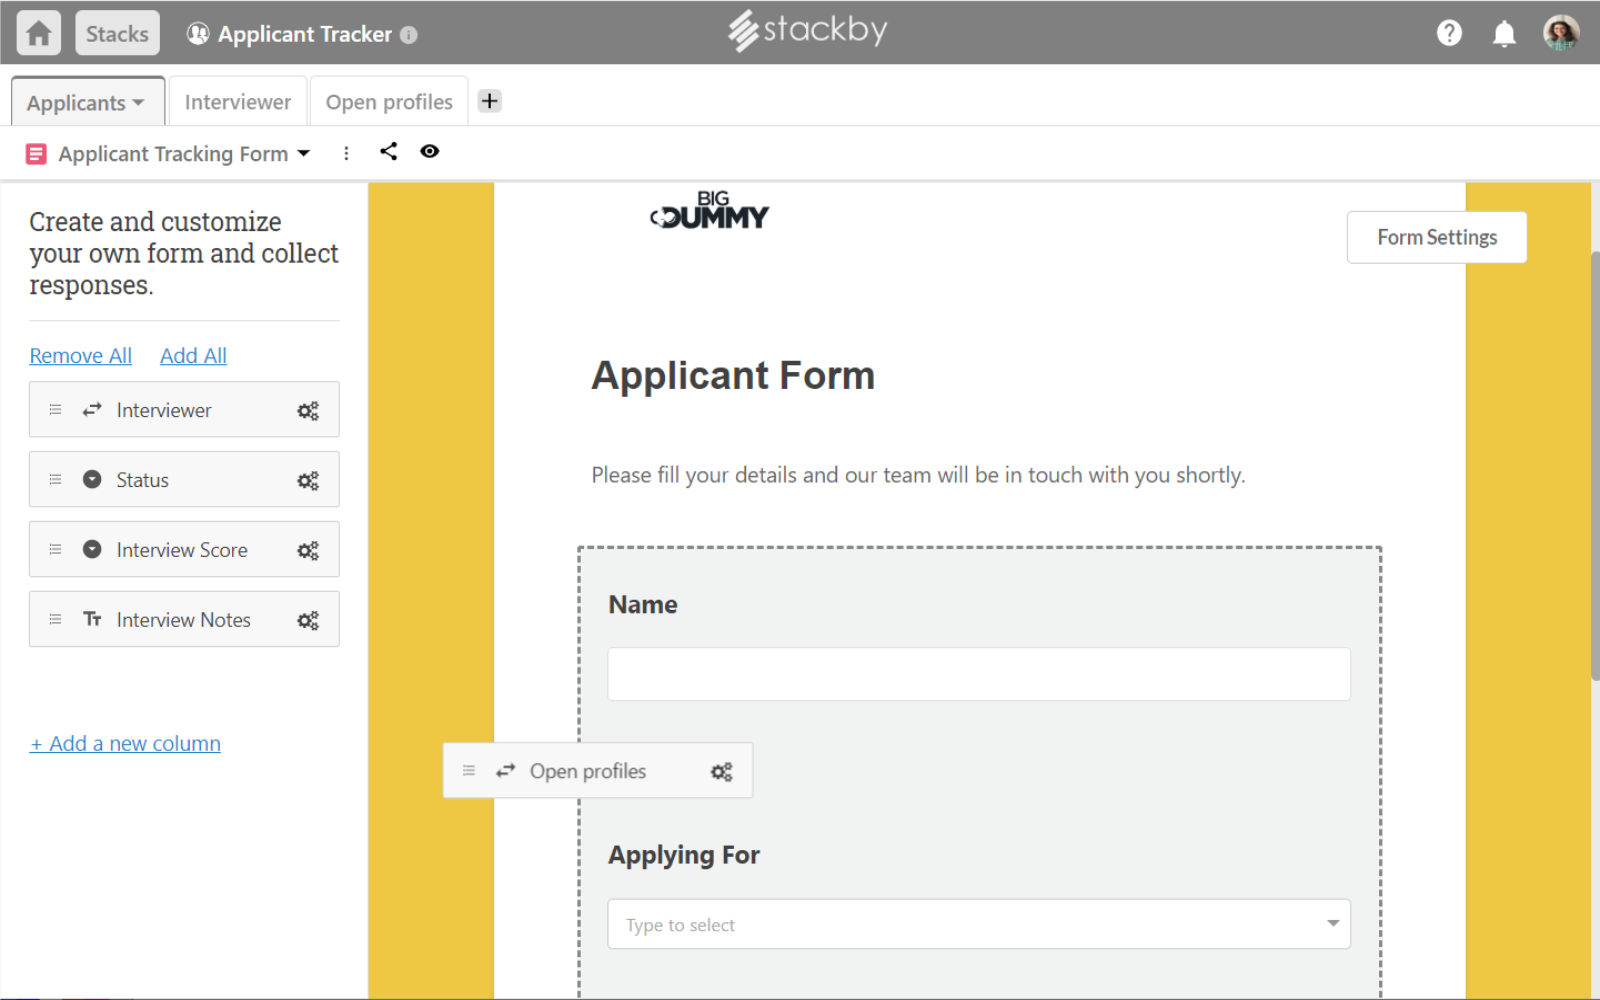
#3. Drag and drop fields to create a form
After creating your database, you need to convert it into a database form layout. You can do that in just two steps.
Step 1: Go to the layout change button above the first column of your table and click on +Add View.
Step 2: Choose the form layout to open the Stackby drag and drop database form builder.
You will see that the column names that you have added to your database are appearing on the left-hand side of the form builder. All you have to do is drag and drop the column names that you want to include in the form in the box shown. This drag and drop form builder allows you to create a database form in a snap.
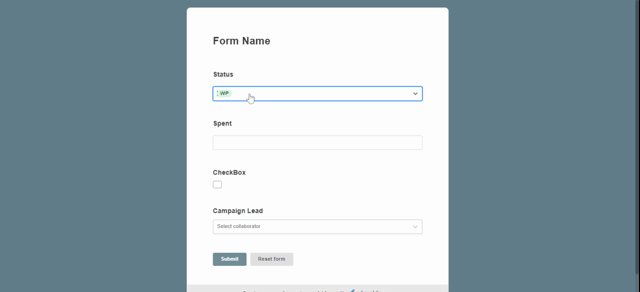
#4. Add elements to your form
Now, it is time to add the different elements to your form and give it a customized look as per your brand requirements. Here is the step by step process to do that:
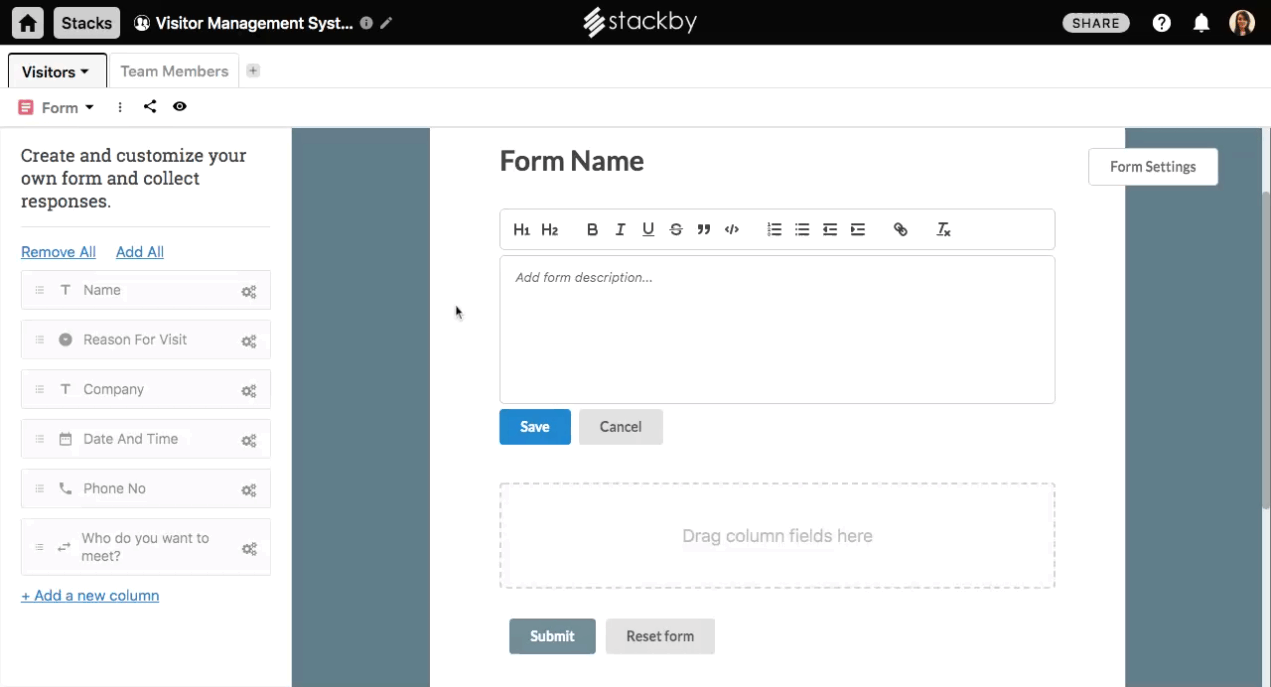
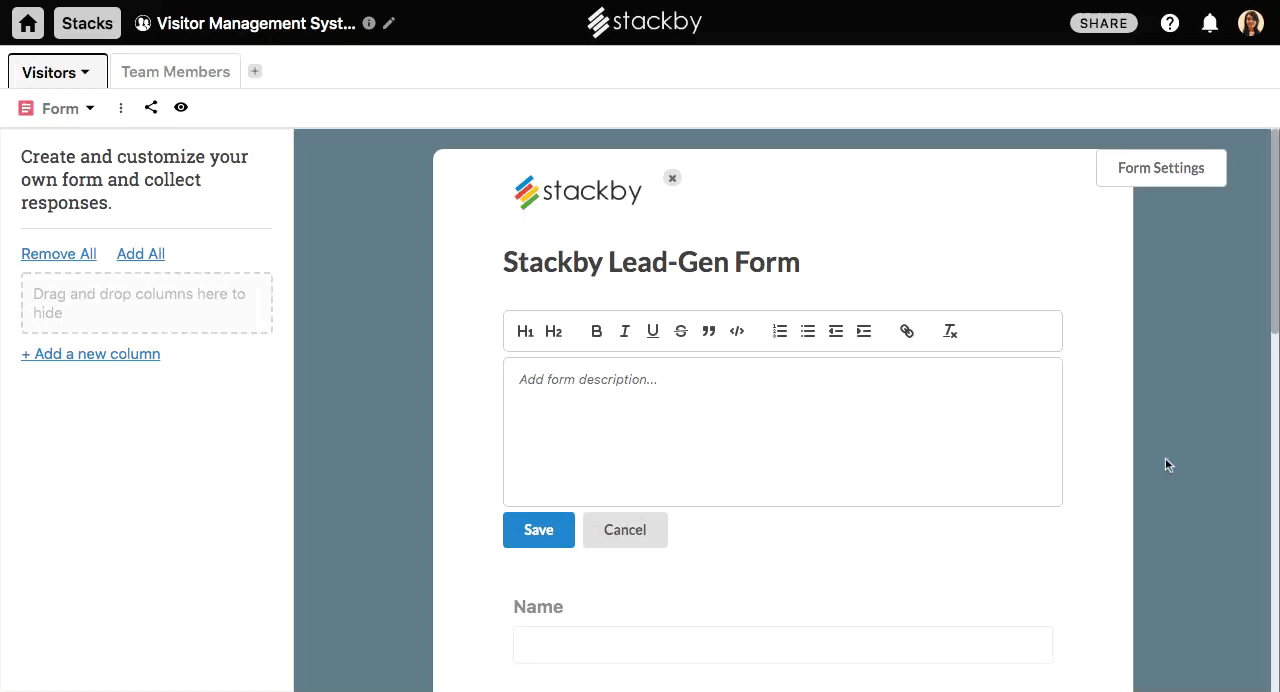
Step 1 (Optional): Add a logo to your form. This will help in personalizing your form for your business. To add the logo, click on the + sign in the first box of the form and add an image of the logo from your computer.

Step 2 (Optional): Add a form name and description. This will make it easier for the people in filling out the form. You can add some privacy statements or simple form instructions in the form description section, making your form look more professional.
Step 3 (Required): Just drag the column names that you want to include in the form in the box shown and create your database form in a snap. If you want to add all the fields of the database, just click on Add All. You can also add descriptions to every form field so that the people filling out the form can understand the significance of each field.
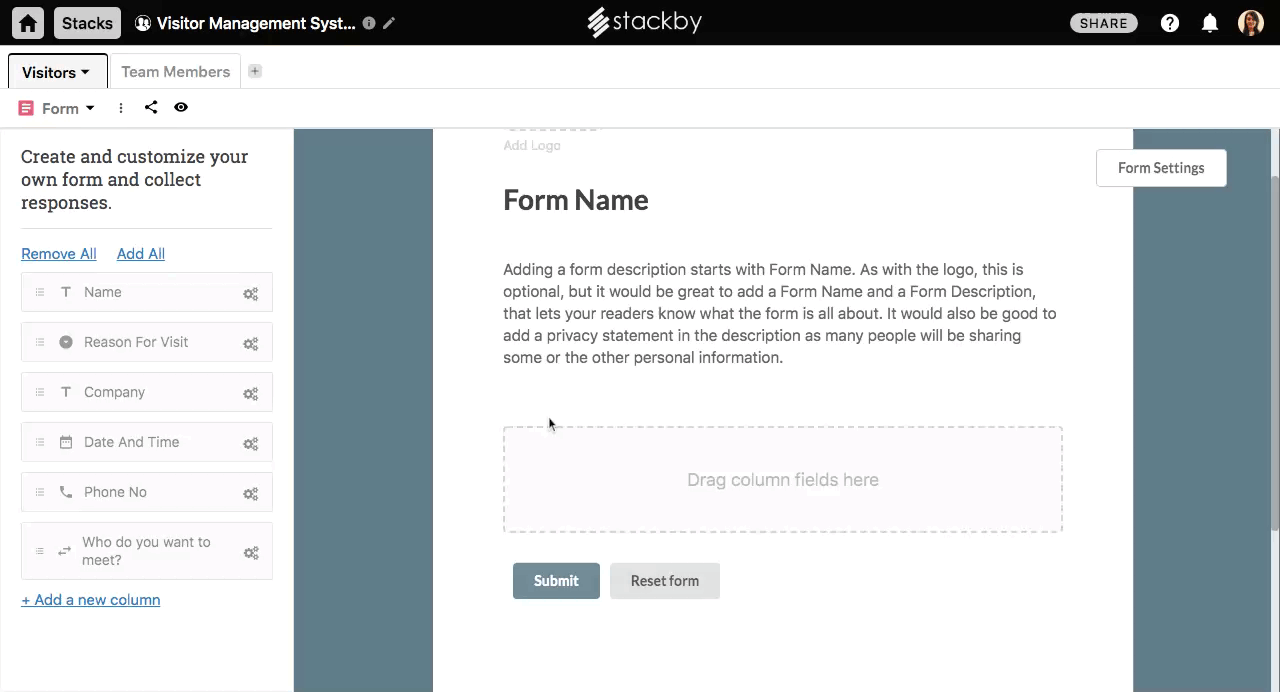
Step 4: In case you want to add some more fields to your form that you forgot to include in the database, just click on ‘+Add a new column’ and add the field here. It will automatically be created in your database as well.

Step 5: You can also change the form settings from the Form Settings button at the top-right corner of your drag and drop database form builder. This includes various options such as:
- Aligning the form heading to the center of the form
- Adding a background color to the form
- Enable sending an email whenever a new form is submitted
- Allowing users to submit more than one response for the form
- Adding a redirect URL that will take the users to a new page after form submission
 Rachit Khator
#5 Optional: Add conditions to your forms
Stackby allows you to add conditional logic to your form. This means that your forms can change based on how a user answers their questions. At Stackby, you can add a conditional logic on form fields that allows you to show fields in a form based on the submitter’s values for previous fields.
For example, consider the applicant tracking form. We can add a conditional logic in the form like if an applicant is applying for the job role of a content writer, they are asked to add their portfolio screenshot. If an applicant is applying for a job role as a database administrator, they would not be asked to add a portfolio screenshot.
To add a conditional logic on a form field, follow the steps given below:
Step 1: Click on the form field to edit it.
Step 2: Toggle on the option “Show this field only when certain conditions are met”.
Step 3: A new filter option would appear where you can select the status of the form fields present above this field that will decide whether the current form field will be visible or not.
Here’s a step-by-step video that explains how to use conditional logic in a form:
#6. Share or Embed your forms anywhere
Now that you have created your database form, added conditional logic, and customized it as per your brand. It is time to share it with the world. With Stackby, you can share the form with your target audience in two ways:
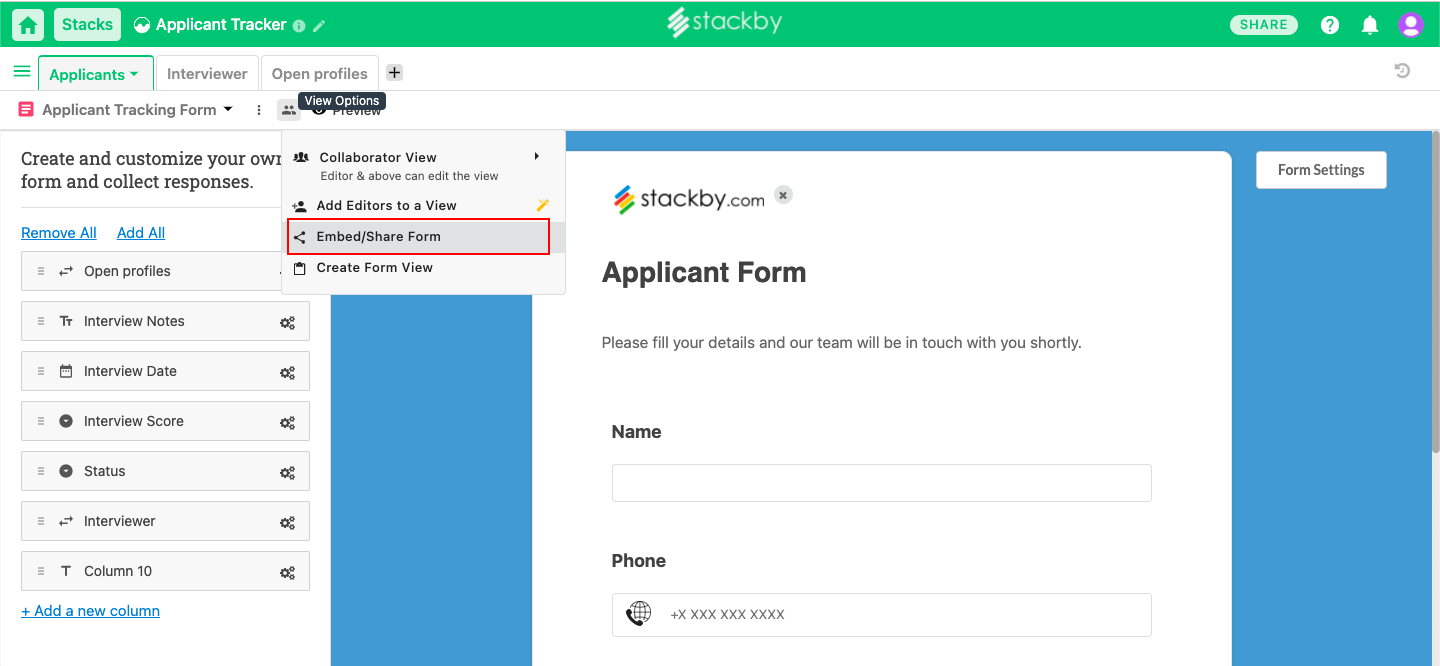
1. By sharing a unique form URL
To find the unique form URL, go to the View Options and select share/ embed form. The first field of the box will include a unique URL of the form. You can copy this URL and add it in an email or chat and share it with your audience.
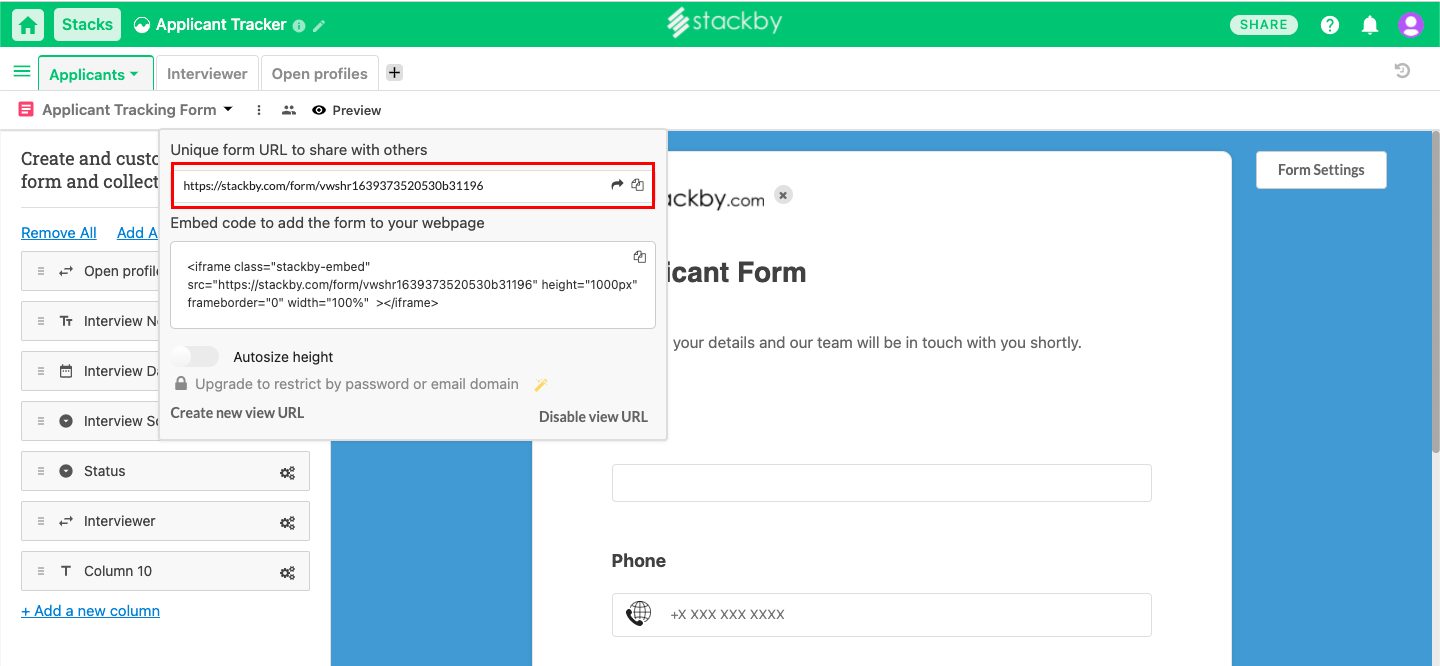
2. By embedding the form link on your website
You can also embed the form into your website or blog. To find the embed code, go to the View Options and select share/ embed form. The second field of the box will show the embed code. Just copy and paste the code on your website and make the form visible to all the website visitors.

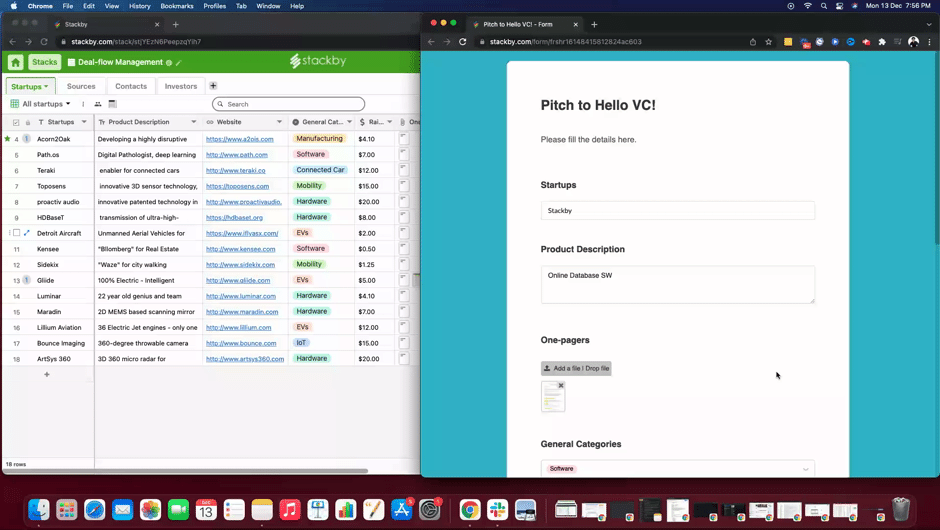
#7. Collect responses directly in the database
Now comes the last and the most important step of how to build forms in a database. This is where you collect responses for your form and add them to your database for streamlining your workflows, managing data, creating reports, decision-making, and so on.
With Stackby, your form data is automatically added to your form database whenever someone submits the form. The responses of the form are saved under the respective column names of your Stackby table, making it much easier for you to manage all your form data.
Build your forms in a database swiftly with Stackby!
Creating forms in a database is not at all tricky with Stackby. All you need is to decide the fields, create a table and change it to form a layout. Customize the look and feel of the form according to your brand/ business, add conditional logic, and share your form with everyone. Stackby also makes it easier for you to manage your form by adding its data automatically to the database.
Take your business a step ahead with Stackby database forms. Join Stackby for free and get started with creating a variety of forms for your business. Check out our latest use-cases on database forms and get started in minutes with our form templates.
Check out our video on how to create custom forms in Stackby to understand the process of creating forms in a database much better.
![Best 14 HR Database Software for Recruitment Agency [Free+Paid] [2026]](/blog/content/images/size/w960/2024/04/stackby--hr-database-software-blog-post-5.3.jpg)
![A Simple Guide on Workflow Management Software [Updated 2026]](/blog/content/images/size/w960/2021/12/work-management-blog.png)